A model-safe guide to deciding whether an L-shaped desk should move intact or in sections, planning the route, protecting every module, and verifying the reassembled desk.
The right ergonomic setup should adapt to your body, support frequent movement, and stay comfortable through a full workday.
The safest way to move most L-shaped desks is to unload and unplug the desk, record its left- or right-hand orientation, and separate it only at the manufacturer-defined joints before carrying the smaller modules through the route. Moving the desk intact can work across one open room, but a doorway, stair, tight turn, long trip, or powered frame usually makes partial disassembly the better choice.
Do not begin by testing whether the corner will flex enough to clear the door. The corner is often where desktop panels, support rails, and a third leg meet. Twisting that junction can loosen hardware, split particleboard around an insert, bend a frame, or pull on motor and controller cables. The useful question is not simply, “Will the desk fit?” It is, “Which manufacturer-approved module will fit through every constraint on the route?”
Choose the moving state before touching a fastener
Start with the model label and assembly instructions. L-shaped desks may be joined with bolts, cam locks, dowels, brackets, shared rails, glued panels, or a combination of these. Electric versions add columns, motors, a control box, a handset, and routed wiring. A generic removal order cannot safely replace the correct manual.
| Situation | Preferred moving state | Decision reason |
|---|---|---|
| Same room, straight path, clear floor, lightweight fixed-height desk | Intact may be reasonable | Only if helpers can keep the frame level without lifting by the desktop overhang or twisting the corner. |
| Interior doorway or narrow hall | Separate the main and return sections when the manual permits | Smaller rectangular modules are easier to measure, turn, protect, and control. |
| Stairs, elevator, truck, or long-distance move | Partial or full manual-defined disassembly | Repeated turns and vibration increase the chance of stressing joints and damaging finished edges. |
| Electric L-shaped standing desk | Unload, lower if the manual allows normal operation, unplug, disconnect documented cables, then reduce into approved modules | The assembled object is heavy and asymmetric, and its cables and lift components need protection. |
| Glass or stone top, glued custom joinery, fixed cabinetry, cracked panel, or unknown construction | Professional mover, installer, or cabinetmaker | The usual reverse-assembly approach may not be safe or reversible. |
This is a decision gate, not a challenge to prove that a fully assembled desk can squeeze through. If you cannot identify a safe lifting surface, a supported joint, and a route with controlled turns, reduce the desk into documented modules or stop.
Run a path-to-module check
Walk the entire path before moving the desk. Include the starting room, door leaves, trim, hallway turns, stair landings, elevator doors, ceiling changes, truck opening, and the destination room. Remove rugs, pets, boxes, and cables that could become trip hazards. Protect flooring and corners before the desk is in motion.
Measure the route, not only the doorway
Record the clear opening after accounting for the door, hinges, handles, thresholds, handrails, and baseboards. Then measure the usable width and depth at every turn. A desktop can pass through a door and still become trapped because the hall does not provide enough room to rotate it.
For each planned module, record its length, width, thickness, and any fixed leg or bracket that projects beyond the panel. Use the largest outside-to-outside dimensions, not the catalog dimensions of the work surface alone. Add padding to the measured envelope because a moving blanket and edge protector also consume clearance.
Preserve the desk's handedness
Photograph the assembled desk from the front, back, and underneath. Mark the main section, return, corner panel, and room-facing edges with removable labels placed on an unfinished or protected surface. Record whether the return was on the seated user's left or right.
Some reversible desks use the same parts in either orientation; others do not. For example, the current OdinLake S3 product information links to a model-specific installation guide whose first assembly choice is left- or right-hand placement. That is exactly the kind of orientation decision worth documenting before disassembly. It should not be inferred from memory at the destination.
Shut down the workspace completely
Back up active work, shut down computers, and remove every item from the desktop. Pack monitors, monitor arms, speakers, lamps, drawers, shelves, glass inserts, and accessories separately. A monitor left attached changes the center of mass and gives helpers one more fragile object to control.
For a powered desk, use the normal controls to bring it to the manual's recommended moving or service position while the desk is still stable. If the manual does not specify a position, a normally functioning desk is generally easier to control at its lowest usable height; do not force a jammed desk to move just to reach that position. Then unplug it from the wall and disconnect accessories from power.
Photograph the underside before separating any cable. Trace each lead from the handset, legs or motors, control box, and power supply. Label both ends without covering the connector latch. Coil each disconnected cable loosely and secure it to the module it belongs to. Do not pull on a wire, fold it sharply, or leave a connector dangling where it can be crushed.
Do not open a motor, control box, lifting column, gearbox, power supply, or enclosed mechanism. Moving the desk does not require internal repair. If a connector, cable, or component is damaged, use model support rather than improvising a bypass.
Disassemble the desk only as far as the route requires

Prepare the exact tools named in the manual, moving blankets, edge protectors, small labeled bags, a parts tray, low-tack labels, and a camera. Avoid using an impact driver for removal: it can strip a soft fastener, spin an insert inside engineered wood, or make it difficult to feel resistance.
Support both sides of every joint
Before loosening a corner bracket or shared rail, support the main and return sections independently. The final fastener must not be carrying the weight of an unsupported panel. One person should stabilize each section while another removes the documented connection. Keep hands out of the narrowing gap between panels and frame members.
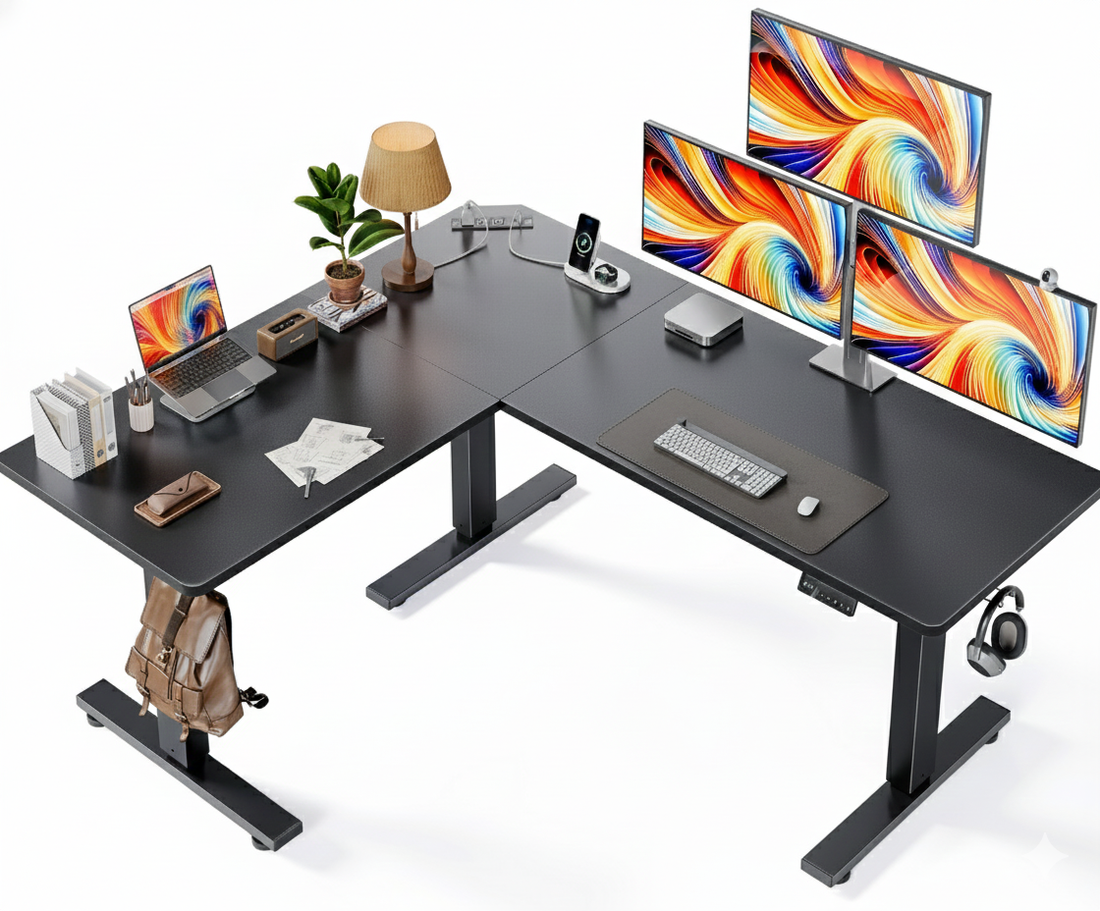
Separate the desk at its designed joint instead of removing random screws until something comes loose. A typical modular L-shaped desk may divide into a main desktop, return desktop, corner piece, and frame sections, but the exact boundaries vary. On the OdinLake S3 installation guide, the desktop is shown as three labeled panels joined with dowels and underside fasteners, and the legs and rails are attached in later steps. That diagram is useful for identifying the model's real structure; it is not permission to reverse every step on a different desk.
Build a hardware map as you go
Put hardware from each joint in its own bag and label the bag by location, such as “return-to-corner underside” or “rear rail at main section.” Include washers, spacers, clips, and cable ties. Photograph the empty holes and the hardware beside them before packing the bag.
Do not mix visually similar screws. A longer screw returned to a thin desktop can damage the finished surface; a shorter one may not achieve the intended engagement. Do not replace a missing fastener with a generic screw during the move. Record the missing part and obtain the correct specification.
Stop at the smallest useful modules
Once the sections fit the entire path and can be controlled safely, stop disassembling. Removing every bracket and insert adds work and creates more opportunities for lost parts, cross-threading, or wear in engineered wood. Conversely, do not leave a module so large that helpers must twist it through the route or carry it by a weak overhang.
For an OdinLake desk, start with the assembly videos and product-guide library and the current guide linked from the exact product page. If your revision, desktop layout, or hardware differs from the guide, pause and confirm the model before proceeding.
Protect and carry each module
Cover finished faces and edges with clean moving blankets. Add rigid corner protection where a desktop may approach a door frame. Secure the padding around the module, but do not put packing tape directly on wood, laminate, paint, veneer, a control cable, or a label that must remain readable.
Plan the carry before lifting. Agree on the route, which person leads, where the module will be set down, and the words for “stop” and “lower.” The National Institute for Occupational Safety and Health notes that manual lifting risk depends on more than weight: horizontal and vertical position, twisting, duration, frequency, and grip all matter. Its lifting-risk guidance is a useful reason not to assign a universal “safe” desk weight or helper count.
NIOSH also advises that team lifts should be planned so helpers do not make surprise movements. Two people do not automatically make an awkward desk safe; poor coordination can add slip, trip, and fall risk. Use more capable help or appropriate moving equipment when the load, grip, stairs, or route cannot be controlled.
- Lift from structural frame locations or manufacturer-designated handholds, not from a desktop overhang, cable tray, handset, drawer, shelf, or motor cable.
- Keep the module close enough to control without trapping hands against the body or door frame.
- Turn with the feet and the planned route instead of twisting the torso while holding the load.
- Use a spotter at blind corners and stairs; the spotter should manage clearance, not stand beneath the load.
- Set each section on padding in a stable orientation. Do not balance a heavy panel on an unprotected finished corner.
If the route requires helpers to lean over a railing, walk backward down stairs without a clear view, support the desk overhead, or improvise a grip, stop and use professional movers with suitable equipment.
Get an L-shaped desk through a doorway
Take the door off its hinges only when you are authorized and know how to reinstall it correctly; first check whether opening it fully provides enough clear width. Remove loose hinge pins or hardware from the path and protect the jamb.
Move one measured module at a time. Approach the opening slowly, keeping the module stable and within the tested orientation. One helper leads while another controls the trailing end; a spotter watches the far corner, protruding brackets, and hands. Stop before contact, set the module down on padding, and reassess rather than forcing it.
Do not use an intact L-shaped corner as a pivot around the jamb. Even if the top clears, the legs may sweep into the wall while the corner joint takes a twisting load. The path-to-module check should have resolved that geometry before anyone lifted the desk.
Reassemble and validate before reloading
Place the protected desktop panels in the recorded left- or right-hand orientation and follow the current manual in the normal assembly direction. Hand-start all related fasteners before tightening them. This helps the joints align without using one screw to pull mismatched parts into position.
Use the original hardware in its mapped location. Tighten to the manufacturer's instructions; “as tight as possible” is not a specification. Reinstall brackets, rails, legs, cable components, accessories, and controls in the documented order. Route wiring away from pinch points and moving frame members.
Many large L-shaped desks must be turned upright after they are assembled upside down. The OdinLake S3 guide specifically calls for at least two people and floor protection when flipping that model. Follow the exact requirement for your desk, and never roll or lever the assembled desk onto an unsupported corner.
Run an unloaded acceptance check
- Confirm that every planned fastener, bracket, spacer, and cable has been reinstalled and no hardware is left over.
- Check the desktop seams for even contact and verify that the desk matches the recorded handedness.
- Place the desk on a level floor and confirm that all feet are supported. Adjust only the provided levelers.
- Apply light hand pressure at the working edges. Stop if a joint clicks, shifts, opens, or shows new movement.
- For an electric desk, inspect every cable first, then reconnect power and run the model's initialization procedure if required.
- Operate an electric desk through its full travel while unloaded. Watch each corner and cable; stop for binding, uneven movement, an error code, abnormal sound, or contact with the room.
- Reload equipment gradually and keep the verified total load within the model's stated capacity.
Once the desk passes the unloaded checks, rebuild the work zones deliberately instead of recreating cable clutter from memory. OdinLake's remote-work setup guide explains how the desktop, screens, chair, lighting, and accessories can work together at the destination.
Do not conceal movement at a corner joint by tightening unrelated fasteners or placing the desk against a wall. A shifted insert, cracked panel, bent rail, or damaged cable needs the correct part or qualified service.
When to hand the move to a professional
Use a professional mover, installer, electrician, or cabinetmaker when the desktop is stone or glass; the desk is built into cabinetry; panels are glued; the route includes difficult stairs; you cannot identify the load-bearing connections; or any frame, insert, cable, motor, or column is damaged. Professional help is also the sensible choice when the only possible move depends on lifting above shoulder height or maintaining an awkward grip.
A successful move ends with more than the desk arriving in the new room. The desk should retain its intended geometry, stability, wiring protection, adjustment range, and hardware map, with no unexplained parts left behind.
Frequently asked questions
Can you move an L-shaped desk without taking it apart?
Sometimes, but only across a short, open route when the unloaded desk is light enough for the helpers to control, the construction permits lifting from structural points, and no corner must be twisted. Doorways, stairs, trucks, electric frames, and long moves usually favor partial disassembly at the manufacturer's intended joints.
How do you get an L-shaped desk through a doorway?
Measure the complete route and each manufacturer-defined module, including legs, brackets, padding, door hardware, and the turning space beyond the opening. Separate the main and return sections when the manual permits, then move one protected module at a time with a leader, trailing helper, and spotter as needed. Do not force the intact corner around the jamb.
Can you disassemble and reassemble an L-shaped desk?
A screw-fastened modular desk often can be disassembled and reassembled, but the exact model manual decides which joints are intended to separate. Glued joinery, damaged engineered wood, hidden cables, glass or stone panels, and non-serviceable mechanisms require a different route. Photograph connections and map every original fastener before removal.
How should you label desk parts for reassembly?
Record the seated user's left and right, then label the main desktop, return, corner, front edge, and room-facing sides. Put the hardware from each connection in a separate bag named for both parts and the joint location. Photograph the joint, empty holes, washers, spacers, and cable route so the label has visual context.
Should a standing desk be moved at its highest or lowest position?
Follow the model's moving or service instructions. If the desk works normally and the manual does not specify otherwise, the lowest usable position usually reduces the assembled height and makes a short in-room move easier to control. Do not operate a jammed or damaged desk just to lower it, and always unplug before disconnecting documented components.
Can you drag an L-shaped desk across the floor?
Dragging is a poor default. It can damage flooring, load the feet sideways, rack the frame, and stress the corner joint. Unload the desk, use its approved lifting points and capable help, or move separated modules with suitable furniture-moving equipment. Floor sliders are not permission to exceed the desk manual or the equipment rating.
How many people are needed to move an L-shaped desk?
There is no universal number. Weight, size, grip quality, stairs, turns, helper capability, and the module's center of mass all matter. Follow the manufacturer; for example, the OdinLake S3 installation guide requires at least two people for the model's upright-flipping step. If the team cannot keep the module stable without awkward postures or surprise movements, add qualified help or use professional equipment.