A practical method for comparing an L-shaped desk’s complete footprint with the room, moving clearances, vertical travel, and delivery path.
The right ergonomic setup should adapt to your body, support frequent movement, and stay comfortable through a full workday.
To measure an L-shaped desk accurately, record the desk and the room as two separate sets of dimensions. For the desk, capture the overall length in both directions, the depth of each work surface, the inside cutout, the height, the base or foot footprint, and the return side. For the room, measure the usable wall lengths, low-level obstructions, door and drawer swings, chair movement, cable access, and the delivery path. The desk fits only when those two records agree.
This method works whether you are measuring an existing desk for a move or checking a product before you order it. It also avoids the most common source of confusion: an L-shaped desk cannot be described reliably by one “width” number.
Measure the Desk and the Room Separately
Start with two simple sketches on separate sheets of paper. Draw the desk from above on the first sheet and the intended room corner on the second. Do not try to make either drawing to scale yet. The purpose is to give every measurement an unambiguous label.
| Record | What it describes | What it prevents |
|---|---|---|
| Desk record | The complete physical envelope, underside clearances, feet, and return orientation | Buying from a single headline dimension or measuring only the desktop |
| Room map | Usable wall space, obstacles, operating space, and the route into the room | Discovering that a desk fits the corner but blocks a door, vent, outlet, or chair path |
| Fit comparison | Each desk dimension matched to the corresponding room limit | Adding unlike measurements or relying on total square footage |
Use one unit throughout the record. Inches are convenient for US product pages; adding centimeters in parentheses can help when a drawing or manual uses metric dimensions. Record the actual number rather than rounding a tight fit up or down.
Build the Desk Record From One Fixed Viewpoint
Label the main edge and the return
Stand or sit where the primary user would normally face the desk. Label the surface directly in front of that position “main” and the perpendicular wing “return.” Then write whether the return is on the user’s left or right. This viewpoint matters because product sellers do not all illustrate orientation in the same way, and some desks are reversible while others are not.
If you are working from a product page, use the dimensioned drawing, selected variant, and assembly information together. A mirrored marketing photo is not enough to establish left- or right-return compatibility.
Capture the outer envelope and the two surface depths
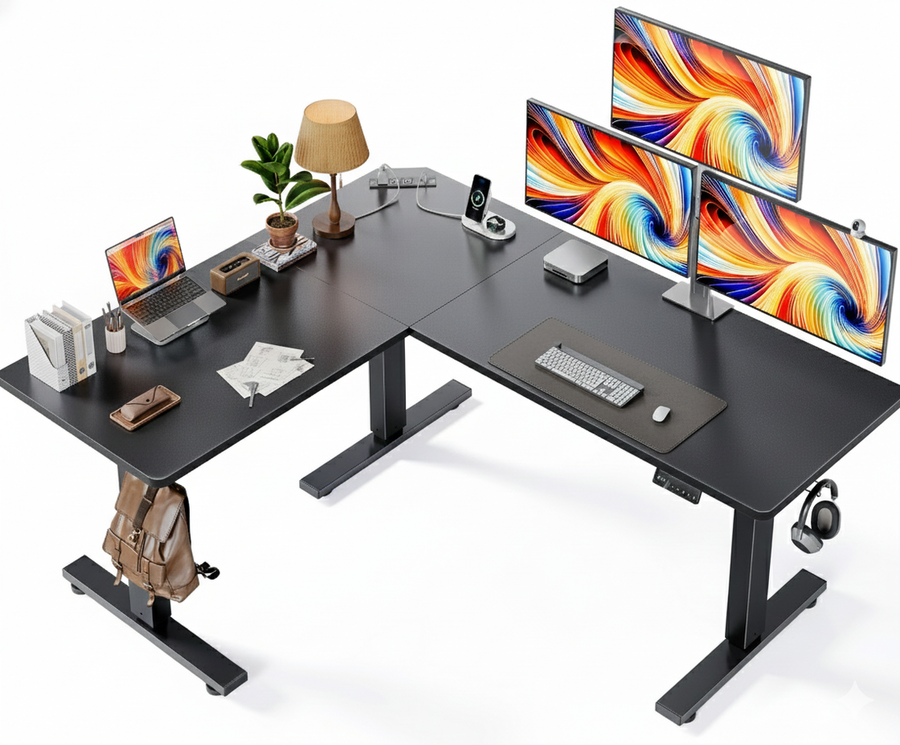
Measure the longest outside-to-outside span in each direction. Call these overall A and overall B. They form the bounding rectangle the desk occupies when viewed from above. Do not add A and B; both begin from the same L-shaped footprint and describe different directions.
Next, measure perpendicular from the back edge to the front edge of the main surface, then repeat for the return. These depths may be different. Finally, measure the inside cutout—the open area where the user and chair approach the desk—because two desks with similar outside dimensions can leave very different usable openings.
If you still need to calculate how much front-to-back work surface your monitor and input devices require, use the separate computer desk depth measurement method. This L-shaped desk guide keeps its focus on the complete furniture-to-room fit.
- Overall A: longest outside span along the main direction
- Overall B: longest outside span along the return direction
- Main depth: back edge to front edge of the primary work surface
- Return depth: back edge to front edge of the perpendicular surface
- Inside cutout: width and depth of the open working corner
Measure the structure, not just the top
Look below the work surface. Record the widest and deepest points of the feet, legs, crossbars, drawers, controller, cable tray, and any fixed storage. A foot can extend beyond the edge of the desktop; a drawer can occupy knee space even when the outer footprint fits.
Measure the work-surface height and the highest fixed part. For an adjustable standing desk, record both the lowest and highest published heights. If the desk has a monitor shelf or hutch, include its full height above the floor.
Under-desk space is a fit measurement too. The OSHA computer-workstation purchasing guide recommends enough space for the legs in different seated positions and lists minimum under-desk clearance depths of 17.6 inches at the knees and 24 inches at the feet, with at least 20.8 inches of clearance width. These are workstation clearances, not a universal room-size formula; compare them with the exact frame, storage, and user needs.
Make a Room Map at Desktop Height and Floor Height
Measure the usable walls at the desk’s working height
Measure from the intended corner outward along both walls, stopping at the first fixed obstruction. Repeat at the approximate height of the desktop. A windowsill, radiator, wall-mounted shelf, trim detail, or sloped wall can reduce usable space even when the baseboard-level measurement looks generous.
Mark outlets, data ports, switches, vents, and window controls. A desk does not need to sit hard against both walls, but the final position must leave required airflow and access. Treat the space you intentionally leave behind the desk as part of the footprint rather than as spare capacity.
Repeat at floor level
Measure baseboards, floor vents, radiator feet, threshold changes, and any object that can conflict with the desk feet. If the room corner is not square, measure the distance between the two planned outer endpoints as a diagonal check. The tape outline later in this guide will reveal whether a slightly angled wall changes the fit.
Draw the moving clearances
A static footprint is only the first layer. Add the chair’s normal pull-back and turning area, the full swing of the room door, storage doors and drawers, and the path people use to cross the room. Use the actual chair and movement pattern when possible rather than relying on a universal clearance number.
For a height-adjustable desk, also mark cables and wall objects that must remain clear throughout travel. The OSHA desk guidance emphasizes adequate leg clearance and enough work-surface depth to position computer components without forcing awkward reach. A large outer footprint is not useful if the frame or return blocks the user from reaching the main input devices comfortably.
Compare the Desk Record With the Room Map

Compare one field at a time. Overall A must fit the corresponding usable wall or floor span; overall B must fit the perpendicular span. The desk feet must clear floor-level obstacles. The top and any shelf must clear wall objects at their respective heights. The inside cutout and under-desk structure must leave a workable approach for the chair and user.
The current OdinLake S5 product page, checked August 27, 2026, shows why the variant and drawing belong in the same record. The 55-inch option is listed as 33.5 inches deep by 55 inches wide with a 46.46-inch maximum height, while its dimension section also identifies the 55.12-inch width, 28.34–46.46-inch height range, and 28.74-inch foot length. Copying only “55-inch desk” would leave out several constraints that can decide the fit.
Use a simple pass/fail comparison:
- Footprint pass: both outer spans and the feet fit inside the mapped floor area.
- Operating pass: the chair, doors, drawers, vents, outlets, and walking path remain usable.
- Vertical pass: the highest desk position, monitor arrangement, shelves, windows, and cable route do not conflict.
- Route pass: the packaged or disassembled components can reach the room through doors, turns, stairs, and elevators.
A failure in any one category means the current configuration does not fit yet, even when the desktop itself fits the corner.
Tape-Test the Footprint Before You Order
Painter’s tape turns the numbers into a full-size rehearsal without moving heavy furniture.
- Mark the two outer spans from the intended corner.
- Connect the outer edges to form the desk’s bounding rectangle.
- Mark the inside cutout so the floor outline is actually L-shaped, not a solid rectangle.
- Mark the widest points of the feet and any floor-level frame extensions.
- Place the chair in the opening and roll or turn through the motions used during a normal task.
- Open the room door, nearby drawers, and storage doors fully.
- Stand at the taped work edge and check whether the intended monitor, keyboard, and frequently used items can occupy the correct surface without forcing the chair into a traffic path.
The expected result is not merely “the tape fits.” You should be able to enter, sit or stand, operate storage, reach the main work zone, and leave the room without crossing a desk foot or blocking a fixed feature. If the test fails, change the return side, move the entire outline, choose a smaller footprint, or remove a conflicting secondary item—then repeat the test.
Add a Vertical Test for an L-Shaped Standing Desk
For a standing model, draw a side-view sketch after the floor plan passes. Mark the desk’s minimum and maximum height, the top of monitors or shelves, the lowest window or wall shelf, and the planned cable drop. Check both end positions and the path between them.
- Nothing fixed should enter the moving desktop’s path.
- Cables should reach both endpoints without becoming taut or dragging across a sharp edge.
- Items under both wings should remain outside the moving frame and feet.
- The controller should remain reachable without colliding with a drawer, chair arm, or wall.
If you are comparing larger corner workstations, the OdinLake S3 product page provides another current, dimensioned L-shaped standing-desk example. Compare the exact variant and drawing with your two-height room map; do not transfer dimensions between S3, S5, or another model.
Stop When the Product Drawing Is Incomplete
Do not guess a missing return depth, foot span, handedness, or assembled height from a photo. Ask the seller or manufacturer for a dimensioned plan for the exact variant. This is especially important for curved corners, integrated cabinets, fixed returns, monitor shelves, and frames whose feet extend beyond the worktop.
Also confirm whether delivery dimensions refer to the assembled desk or shipping cartons. For a move, follow the model’s current assembly instructions before separating any structural or motorized components. A measurement guide can establish fit, but it cannot replace model-specific disassembly instructions.
Once the four passes are clear, compare current L-shaped and straight options in the OdinLake desk collection using the same desk record. Reusing one measurement method makes differences between models much easier to see.
Frequently Asked Questions
How are L-shaped desks measured?
Measure the longest overall span in each direction, then record the depth of both work surfaces, the inside cutout, height, feet, and return orientation. Keep those fields separate; adding the two outer spans does not describe the desk’s footprint.
What is the return on an L-shaped desk?
The return is the perpendicular wing that creates the L. Sellers commonly describe it from the seated user’s position, but you should confirm the exact product drawing because some models are reversible and naming conventions can vary.
How do I know whether I need a left- or right-return desk?
Sit or stand where you will face the main work surface. If the secondary wing must extend to your left to clear doors, traffic, and wall obstacles, you need that left-side configuration; use the same logic for the right. Confirm how the manufacturer defines orientation before ordering.
What size room do I need for an L-shaped desk?
There is no single room size that fits every L-shaped desk. The room must hold the exact outer footprint plus the actual chair movement, door and drawer swings, walking route, wall obstacles, and any accessibility needs. A full-size tape outline is more reliable than room square footage alone.
Should I measure an L-shaped standing desk at sitting or standing height?
Measure both. The floor footprint may stay constant, but the desktop, monitors, shelves, and cables travel vertically. Verify the two endpoints and the entire moving path against windowsills, shelves, outlets, and cable length.
Can I calculate an L-shaped desk’s fit from surface area?
No. Surface area can compare usable top space, but it does not reveal the return side, inner cutout, foot position, chair approach, or room obstacles. Use an outer-envelope and clearance comparison for fit; calculate area only for a separate work-surface question.