The right ergonomic setup should adapt to your body, support frequent movement, and stay comfortable through a full workday.
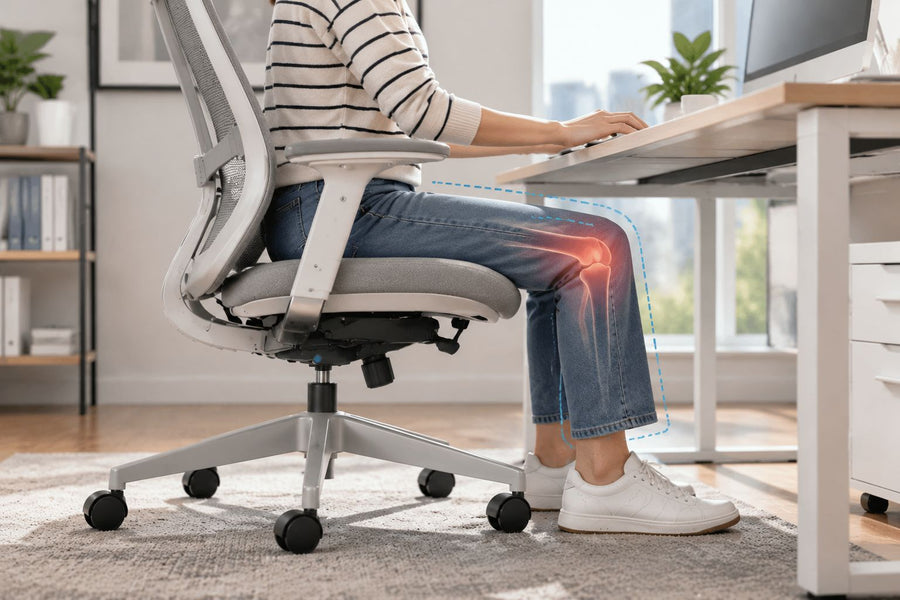
A poorly matched office chair can contribute to or aggravate hip-area discomfort, but the chair alone cannot tell you what is causing the pain. A seat that crowds the sides of the body, leaves the feet unsupported, blocks access to the backrest, or creates a hard local contact is worth correcting. Improvement after a fit change suggests that the chair or workstation was one contributing factor; it is not a diagnosis.
Hip pain has many possible sources, including injuries and conditions unrelated to office furniture. Start with safety, then use observable chair-fit clues and reversible adjustments. Do not force a posture, keep sitting until pain appears, or buy a chair marketed as a treatment.
This guide is for checking the chair-to-person-to-desk fit. It does not diagnose hip pain, prescribe treatment, or replace advice from a qualified healthcare professional.
Decide whether a chair check is appropriate
Do not begin by naming a muscle, joint, tendon, or nerve. The NHS hip-pain guidance lists several possible causes and advises people not to diagnose the cause themselves. Where the discomfort is felt can be useful information for a healthcare professional, but it does not turn a chair check into a diagnosis.
Skip the furniture experiment and seek prompt medical guidance if the pain is severe or began after a fall or other injury, you cannot walk or bear weight, the hip is suddenly swollen, hot, or discolored, or you have fever, tingling, or loss of feeling. Arrange a non-emergency evaluation when pain is worsening, keeps returning, interferes with normal activity or sleep, or does not improve with appropriate self-care. Follow local emergency guidance and any instructions already given by your clinician.
If none of those conditions applies and ordinary sitting is tolerable, make a short pre-check record:
- Point to the broad area where you feel discomfort: front or groin area, outer side, rear hip or buttock, or somewhere else.
- Note whether it is on one side or both sides and whether it was present before you sat down.
- Record whether it begins on contact, develops during a desk task, or is strongest when you stand up.
- Compare the pattern across your office chair, another familiar chair, a car seat, walking, and lying down.
- Write down recent falls, unusual activity, illness, or other changes that a clinician would need to know.
These observations help you decide whether one chair deserves investigation. They do not identify anatomy or establish cause.
Look for a failed fit relationship, not a “bad posture”
A chair can fit one person and task while failing another. The useful question is not whether the chair looks ergonomic; it is whether the seat, backrest, floor, work surface, and input devices can support your work at the same time.
The Canadian Centre for Occupational Health and Safety guidance on ergonomic chairs recommends seat width that allows comfortable, even pressure and changes in posture; seat depth that lets the user reach the backrest without pressure behind the knees; and a height that permits foot support without underside-thigh pressure. Those are fit relationships, not medical treatments.
| Fit relationship | Observable failure | Reversible check |
|---|---|---|
| Seat width and side clearance | A seat edge, raised bolster, or armrest support presses the sides of the upper thighs or hip area; clothing or movement feels crowded | Sit centered and check for clear, non-pinching space at both sides without forcing the legs together |
| Seat height and foot support | The feet hang, only the toes reach, or you must brace on the chair base; lowering the chair then leaves the desk too high | Set the seat for supported feet and thighs, or use a stable footrest when desk height requires a higher chair position |
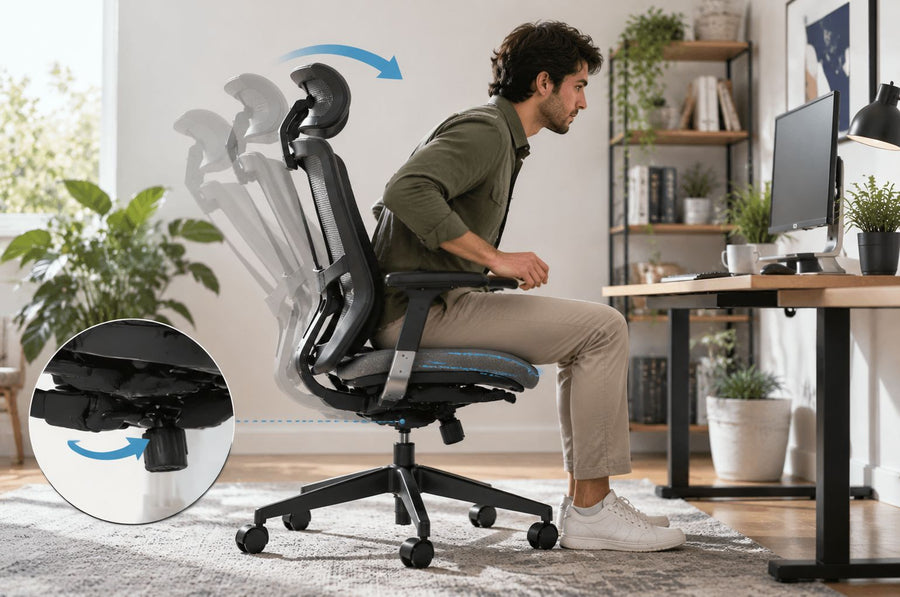
| Seat depth and backrest access | You cannot sit back without the front edge approaching the backs of the knees, or you perch forward to obtain clearance | Use only the documented depth adjustment and look for simultaneous back support and clear knee space |
| Seat surface and shape | A hard seam, exposed frame, collapsed area, pronounced side ridge, or one-sided slope matches the contact area | Inspect the empty seat; stop using it if a structural or surface defect is visible |
| Chair-to-desk interface | Armrests hit the desk, the keyboard is too far away, or the screen position repeatedly pulls you to one side or to the front edge | Bring the work within reach while keeping the chair in a supported position |
A failed row gives you a specific variable to test. It does not mean that row is the medical explanation for the pain.
Inspect the chair while it is empty
Before changing your body position, remove objects from the seat and from your pockets that could create an obvious contact point. Put the chair on a flat, firm surface and inspect it in good light. Do not tip or load the chair to investigate it.
- Seat perimeter: Check the front and side edges for hard ridges, torn upholstery, loose trim, exposed fasteners, or a frame that can be felt through the material.
- Seat consistency: Compare the left and right sides visually. A collapsed cushion, detached mesh, broken support, or unexplained tilt is a product-condition issue.
- Seat attachment: Look for a gap, crack, displaced part, or visible looseness where the seat joins the mechanism.
- Normal controls: Identify the exact model before moving any lever. A symbol may suggest a function, but the manual determines the control and range.
- Chair behavior: Unexpected dropping, uncontrolled tilt, severe wobble, binding, or a sharp mechanical sound is a reason to stop using the chair.
Do not hide damage under a cushion or attempt a structural repair as part of a comfort check. Photograph the defect, record the model and order information, and route the chair to its manufacturer or authorized service channel.
Run a no-purchase chair-contribution check

Use the chair only if it is structurally sound and sitting does not trigger a safety concern. The goal is to find a repeatable fit difference with as little provocation as possible.
- Save the starting state. Photograph the current controls and note the task, discomfort location, and whether symptoms are already present. This prevents an adjustment loop in which nothing can be compared.
- Center yourself without wedging in. Confirm that the seat and the narrowest space between fixed arm structures do not pinch either side. If you cannot sit centrally with ordinary clothing and small position changes, record a width failure; do not force the chair to fit.
- Establish foot support. Adjust height through the documented control until both feet are supported and the front edge is not concentrating pressure under the thighs. If the desk requires the chair to be higher, add a stable footrest rather than using the chair base as a step. OdinLake’s office-chair height guide explains the chair–desk–foot-support sequence in more detail.
- Make the backrest reachable. If the model provides seat-depth adjustment, move it only within the stated range. Seek a position where you can use the backrest while maintaining space behind the knees. If that combination is impossible, the usable depth does not fit you.
- Remove desk interference. Lower, move, or stop using armrests only as the model permits when they block desk approach. Keep the keyboard and pointing device close enough that a normal task does not pull you off the backrest or rotate you toward one side.
- Try one ordinary task briefly. Use a task that normally reveals the issue, but stop at the first meaningful increase. There is no required number of minutes and no benefit in proving how long you can tolerate pain.
- Change one field and repeat only after returning to baseline. Change width clearance, height, depth, or input reach—not all of them together. If symptoms remain above baseline, end the check instead of continuing.
Exact controls vary by model. If you need the overall order, use the current OdinLake chair-adjustment guide together with your model manual, then return to the single-field comparison above.
Interpret the result without overclaiming
Classify the check by what changed, not by what you hope it proves.
| Result | What you can reasonably conclude | Next action |
|---|---|---|
| A specific fit change consistently reduces local pressure without creating a new mismatch | The previous setup likely contributed to the sitting discomfort | Keep the reversible setting, vary position as comfortable, and monitor the pattern |
| The seat or mechanism has a visible defect aligned with the contact area | The chair has a product-condition problem; the symptom still is not diagnosed | Stop using the damaged chair and request model-specific support |
| No safe setting provides side clearance, foot support, backrest access, and desk reach together | The chair or workstation has a documented fit mismatch | Measure the failed range and compare a more suitable setup |
| The same discomfort occurs in several chairs or outside sitting | The pattern is not specific to one office chair | Stop treating furniture replacement as the only answer and seek medical guidance when appropriate |
| Pain becomes sharper, spreads, or remains elevated after the brief check | Further testing is unlikely to add useful fit information | End the test and obtain appropriate healthcare advice |
Even a clear before-and-after result supports only a limited statement: the setup changed your comfort during that task. It cannot tell you whether the original source is the hip joint, nearby tissue, the back, or another condition.
Check whether the desk is forcing the chair out of position
Sometimes the chair can fit the person or the desk, but not both at once. The CCOHS chair-adjustment procedure treats the seat, work surface, and floor as linked contact areas. It recommends adjusting the chair for the user first, then checking the workstation and adding foot support if a fixed desk requires a higher chair.
Watch for these system-level conflicts:
- The chair is raised to reach the keyboard, but the feet lose support.
- The chair is lowered for the feet, but the shoulders rise to use the desk.
- Armrests collide with a desktop or drawer and keep the seat too far away.
- A keyboard, mouse, phone, or secondary screen causes repeated reaching or rotation to one side.
- Limited leg clearance prevents small position changes or makes one leg stay outside the desk.
A footrest, keyboard tray, repositioned input device, or suitable desk adjustment may solve the failing interface. It is more useful to correct the specific conflict than to label one posture “perfect.”
Measure the failure before replacing the chair
Do not shop from the symptom name alone. “Chair for hip pain” is a marketing category, not a fit specification. Measure the current chair and preserve the values that pass as well as those that fail.
- Record usable seat width, including the narrowest clearance created by armrest supports or raised edges.
- Record the minimum and maximum seat height under normal use.
- Record usable seat depth at both ends of any documented adjustment range.
- Measure desk underside clearance, work-surface height, and the chair height needed for the keyboard.
- Note whether the backrest remains usable at the passing height and depth.
- Verify the exact model’s user limits, controls, warranty, return terms, and approved accessories.
Use the limiting dimension, not the largest marketing number. For example, if a chair is listed as 20 in (50.8 cm) wide overall but fixed supports leave only 18 in (45.7 cm) of clear sitting space, record 18 in as the relevant side-clearance value. Apply the same rule to usable depth and desk clearance.
The OdinLake guide to measuring an office chair separates usable seat dimensions from overall room footprint and desk clearance. Use that record to compare current specifications in the ergonomic chair collection. A candidate is useful only if its documented range corrects your failed field without sacrificing the relationships that already passed.
Whenever possible, test the chair during the real keyboard, mouse, reading, and call tasks you perform. A showroom sit or a long feature list cannot confirm fit across a workday.
Treat cushions as geometry changes, not cures
A cushion can change contact, but it also raises the body, shortens the effective seat depth, alters backrest contact, changes armrest height relative to the elbows, and may reduce side clearance. That makes it a system change—not evidence that a particular product treats hip pain.
If you try an add-on that is permitted for the chair, it should lie fully supported, remain stable, avoid controls and moving parts, and preserve safe entry and exit. Recheck every fit relationship after placing it. Do not stack pillows or foam, bridge a broken seat, cover a crack, or use a slippery pad. Stop if the addition creates rocking, edge pressure, numbness, heat, or a worse working position.
Individual medical seating needs belong with a qualified clinician or ergonomics professional who can assess the person and task. General furniture guidance cannot select a therapeutic cushion.
Choose the correct next owner
- Keep the setting: when one documented, stable adjustment improves the fit and no concerning symptom is present.
- Correct the workstation: when desk height, input reach, leg clearance, or armrest collision forces the chair out of its passing position.
- Contact product support: when the seat is damaged, controls behave unexpectedly, or the required range and compatible part are model-specific. OdinLake owners can send model, order, photos, settings, and the observed failure to OdinLake support.
- Compare another chair: when the current seat cannot provide width, height, depth, backrest, and desk fit together despite correct use.
- Seek healthcare advice: when symptoms are severe, follow an injury, trigger the warning signs above, persist, recur, affect sleep or normal activity, or are not specific to one chair.
The best endpoint is not proving that a “bad chair caused hip pain.” It is leaving with a defensible action based on observed fit, product condition, and appropriate medical boundaries.
Frequently Asked Questions
Can sitting in an office chair cause hip pain?
Sitting in a chair that does not fit can contribute to or aggravate hip-area discomfort through crowding, poor foot support, limited backrest access, or a hard contact point. That pattern does not prove the chair caused a medical condition. Hip pain has many possible causes, so use fit observations and seek care when symptoms warrant it.
How do I know if my office chair is too low?
The chair may be too low for the current setup if the work surface forces your shoulders and arms upward, your knees feel crowded relative to the seat, or a low position increases pressure and makes standing difficult. Do not use one joint angle as a universal rule. Check supported feet and thighs, backrest access, input height, and desk clearance together.
Can a narrow office-chair seat cause hip discomfort?
A narrow usable seat or inward armrest structures can create side contact, restrict ordinary position changes, or push you forward. Check the narrowest clear width rather than the advertised overall chair width. If you cannot sit centered without pinching or forced leg position, record a fit failure instead of trying to adapt your body to the seat.
Should my knees be lower than my hips in an office chair?
No single knee-to-hip angle is correct for every person, task, or medical situation. Prioritize stable foot support, broad thigh support without front-edge pressure, access to the backrest, and a position you can change voluntarily. Follow individualized instructions from your healthcare professional over general posture advice.
Will a seat cushion fix hip pain?
A cushion may change pressure or contact, but it cannot diagnose or reliably fix the source of hip pain. It also changes seat height, effective depth, backrest contact, armrest relationship, and stability. Use only a stable, compatible product, recheck the entire setup, and never use padding to hide structural damage.
When should I see a doctor about hip pain?
Seek prompt care for severe pain, pain after an injury with inability to walk or bear weight, sudden swelling, a hot or discolored hip, fever, tingling, or loss of feeling. Arrange an evaluation when pain worsens, returns, affects sleep or normal activities, or does not improve with appropriate self-care. Do not continue chair testing through those signs.