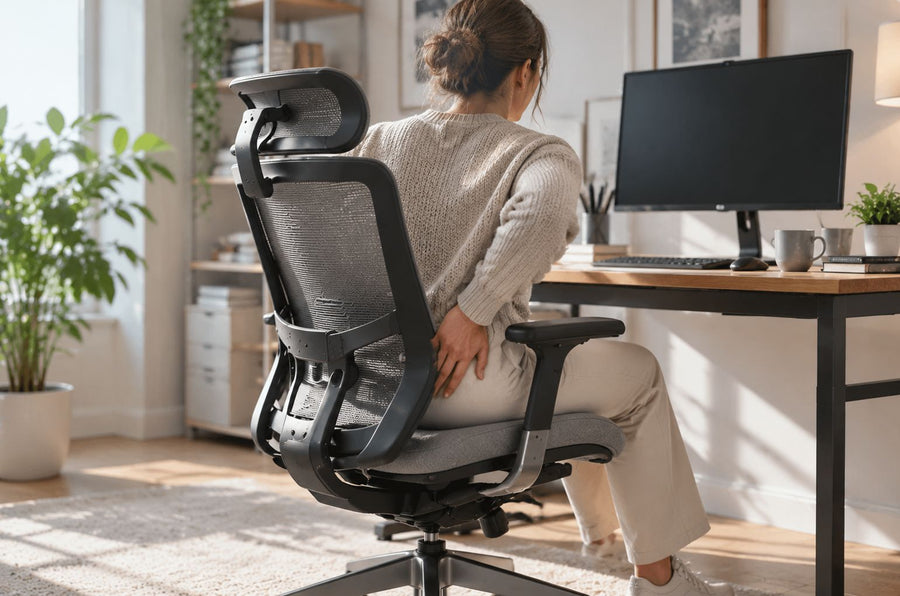
The right ergonomic setup should adapt to your body, support frequent movement, and stay comfortable through a full workday.
You can reupholster an office chair at home when its padded seat or back is a removable panel and the original cover is attached with accessible staples. Do not treat every office chair as the same project. Tensioned mesh, molded shells, sewn multi-panel covers, bonded upholstery, powered features, and hidden fasteners usually require a model-specific replacement part or a professional upholsterer.
This guide uses “reupholster” in the common search sense, but the task below is more precisely recovering: replacing the outer fabric while keeping sound foam, the rigid seat pan, and the chair structure unchanged. If the foam, mounting points, frame, or mechanism is damaged, new fabric will not solve the underlying problem.
First decide whether the chair can be recovered

Look underneath the seat and behind the back before buying fabric. Find the chair’s model label, then check its manual or parts diagram. For an OdinLake chair, the assembly and product-guide library is the right starting point because fastener locations and removable assemblies differ by model.
A removable padded insert with an exposed staple line is a reasonable DIY candidate. A seam, zipper, or visible screw does not prove that a panel was designed for user removal.
| What you find | Best route | Why |
|---|---|---|
| Removable padded panel; fabric stapled to a rigid underside | Recover it if the manual permits panel removal | The old cover can document the cut, direction, folds, and attachment pattern. |
| Shaped cover made from several sewn pieces, piping, or a fitted zipper | Use an upholsterer or an exact replacement cover | Fit depends on pattern making and seam placement, not just pulling a flat sheet tight. |
| Tensioned mesh captured inside a frame | Use a model-specific panel or service route | The mesh, edge retention, and frame form one load-bearing support system. |
| Bonded, heat-staked, riveted, or molded upholstery | Use a professional or replace the panel | Removing the cover may damage the seat pan or leave no safe way to reproduce the attachment. |
| Cracked pan, loose mounting insert, bent bracket, or damaged mechanism | Stop and replace or service the damaged part | Fabric cannot restore structural integrity. |
A tensioned mesh seat is not a padded panel with decorative cloth over it. Do not wrap new fabric across mesh, drill the frame, or add staples where the manufacturer did not provide them. Clean an intact mesh surface according to its care instructions; OdinLake’s mesh-chair cleaning guide covers that separate maintenance task.
Choose upholstery fabric for the chair’s real use
Buy material sold for seating upholstery rather than choosing by color alone. Ask the supplier for the fabric’s intended application and available performance data. Daily desk seating creates repeated friction at the front edge, corners, and contact zones, while swiveling and entering the chair can pull the cover in several directions.
The Association for Contract Textiles explains that textile performance can involve flammability, crocking, colorfastness, physical properties, and abrasion. Its performance-guideline overview also makes an important point: a test result helps compare materials for a recommended application, but one number does not describe the whole textile. ACT’s abrasion guidance specifically warns that a high laboratory abrasion result alone does not predict service life.
For a home-office seat, consider all of these together:
- Intended use: the supplier identifies the material as upholstery suitable for seating, not drapery or craft fabric.
- Surface behavior: the weave does not feel abrasive against clothing and is not so loose that keys, pet claws, or hardware can catch it easily.
- Direction: the grain, nap, or pattern has a clear front-to-back orientation that you can keep consistent across the seat and back.
- Cleanability: the care method matches how the chair will be used; save the supplier’s care instructions.
- Thickness and flexibility: the fabric can turn the panel’s corners without creating a bulky stack that blocks clips, screw bosses, controls, or trim.
- Color stability: the supplier provides relevant colorfastness information if the chair receives sunlight or rubs against light-colored clothing.
Do not add a new flame barrier, foam layer, adhesive, or chemical treatment just because a generic tutorial recommends it. In the United States, upholstered furniture made or reupholstered for sale is subject to federal flammability and labeling requirements. The U.S. Consumer Product Safety Commission’s upholstered-furniture FAQ distinguishes personal-use projects from furniture reupholstered for sale and explains that newly added cover and filling materials can be regulated. Commercial, resale, workplace-facility, or public-space projects should go to a qualified upholsterer who can document the applicable material and labeling requirements.
Gather the tools and make a reversible record
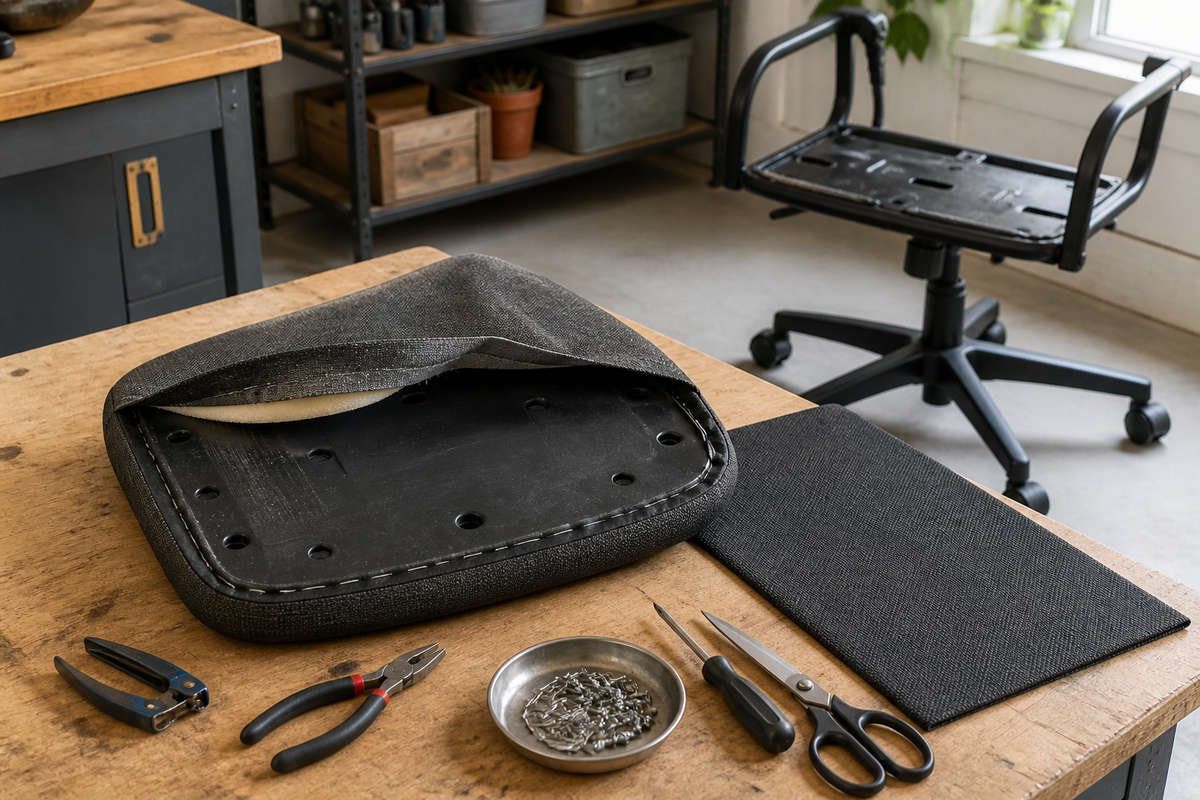
For a simple stapled panel, prepare the replacement upholstery, a screwdriver that fits the original fasteners, a hand staple remover, pliers, fabric scissors, tailor’s chalk, a camera, small containers for hardware, and the correct staple tool. Wear eye protection while pulling old staples, keep your free hand out of the tool’s path, and follow the staple-tool instructions.
Do not guess staple length. Match the original attachment method and use a staple that the seat-pan material and tool manufacturer permit. A staple that is too long can reach the cushion side or damage a thin pan; one that is too short may not hold. If the original cover was not stapled, this workflow is not a reason to convert it to staples.
Before removing anything:
- Photograph the complete chair from the front, sides, back, and underside.
- Photograph the seat-to-mechanism connection and every visible cable, lever, washer, spacer, and fastener.
- Mark the front of the removable panel with low-tack tape in a place that will not stain it.
- Prepare one hardware container for the seat and another for the back; do not mix fasteners.
- Measure and photograph the visible direction of the old weave or pattern.
This record is not busywork. Office-chair fasteners can look similar while differing in length, shoulder shape, thread, or washer order. Reusing each original part in its documented position is safer than reconstructing the sequence from memory.
Remove only the upholstered panel
Follow the exact model instructions. Disconnect power first if the chair has powered heat, massage, charging, or other electrical features. Stabilize the chair so it cannot roll or tip, and keep fingers away from the mechanism’s moving joints.
Remove the padded panel without separating the gas cylinder, base, recline mechanism, or other pressure- or load-bearing components. If the manual requires a larger assembly to come apart, if a cable disappears into the panel, or if hidden clips resist normal hand pressure, stop and use model support. Do not pry against a finished shell or strike the gas lift.
Once the panel is on a stable workbench, preserve all permanent labels. Remove the dust cover only if it blocks the original attachment line, and keep it intact for reinstallation. Lift staples one at a time; pull fragments with pliers rather than leaving sharp metal under the new cover.
Use the old cover as a map, not an excuse to copy damage
As you release the cover, photograph each corner before flattening it. Mark front, back, left, and right on the hidden side. If the piece is intact and was originally cut from one flat sheet, it can serve as a practical pattern for the new material.
Do not copy a stretched edge, torn corner, or previous repair as though it were the original shape. Instead, compare opposite sides, preserve the original grain direction, and leave enough material to reproduce the documented folds and reach the original staple line. When the old cover is distorted beyond recognition, make a paper pattern from the panel or take the project to an upholsterer rather than guessing.
Inspect what the fabric was hiding. Stop if you find:
- cracked plastic, split wood, or a loose threaded insert;
- wet, moldy, crumbling, or permanently compressed foam;
- sharp metal, a broken bracket, or evidence that a fastener has pulled through;
- a cable, sensor, heating element, or mechanism attached to the cushion;
- an adhesive or sewn construction that cannot be reproduced with the original method.
Foam replacement is a different project. Its shape, firmness, thickness, fire performance, and fit under the cover all matter. Do not add arbitrary foam on top of a failed cushion and assume the chair’s seat height, edge pressure, controls, or mounting clearance will remain correct.
Recover the removable seat panel step by step
1. Cut one accurately oriented piece
Lay the new upholstery face down on a clean surface. Align the old cover or verified pattern with the new fabric’s grain, nap, or design. Mark the hidden side and cut a single piece that preserves the reach of the original cover. Keep pattern lines centered on the panel rather than centered only on the untrimmed fabric.
2. Position the panel before fastening
Place the foam and rigid pan in the same orientation they had originally. Center the new cover and bring the material over the front, back, left, and right edges. Check the visible top before placing any permanent fastener. A pattern that appears straight underneath can still look skewed from the sitting side.
3. Anchor opposing centers
Use one temporary attachment at the center of the front, then one at the center of the back. Repeat at the left and right centers. Pull only enough to remove slack and keep the surface smooth. Excessive tension can compress an edge, distort a pattern, or make the finished seat feel different.
4. Work outward in a balanced sequence
Add attachments in small alternating steps from each center toward the corners: front, back, left, right. Keep checking the top surface. If a wrinkle appears, remove the nearest temporary staples and correct the fabric instead of pulling harder from the opposite side.
5. Reproduce the original corner folds
Use the before-photos to fold each corner the way the original cover was managed. Distribute the material so the visible corner stays smooth and the underside does not build a hard lump. Do not place fabric, folds, or staples over screw holes, threaded inserts, clips, cable paths, vents, or the perimeter that must sit flush against trim.
6. Finish the attachment line
After the surface is aligned and evenly tensioned, replace temporary attachments with the verified staple pattern and specification. Remove loose threads and trim only excess that the original construction did not retain. Reinstall the original dust cover without concealing damaged structure or removing permanent labels.
Treat the back and arms as separate construction problems
A padded back insert can sometimes be recovered with the same sequence, but only if it is a removable, stapled panel. A back often has more contour, a directional pattern, and tighter clearance around lumbar supports or trim. If the cover uses multiple sewn pieces or the panel is bonded into a shell, professional pattern work is the more reliable route.
Most office-chair arm pads are molded, replaceable components rather than miniature upholstered panels. Do not wrap fabric over a control button, moving joint, mounting fastener, or the surface needed for the chair to clear the desk. If an arm pad is loose or damaged, diagnose the fastening or replacement problem separately instead of hiding it under fabric.
Reassemble and test before returning to normal use
Reattach the panel with the original hardware in the photographed order. Start each fastener by hand, tighten evenly, and use the model’s torque instruction when one is provided. Do not add threadlocker, washers, or substitute screws unless the manufacturer specifies them.
Before sitting, confirm that every mounting point is seated, every control moves freely, no fabric is pinched between structural surfaces, and no hardware remains on the bench. Then test in stages:
- Press the seat by hand and listen for movement, cracking, or loose hardware.
- Apply light body weight while holding a stable support; stop if the panel shifts.
- Sit normally and operate height, tilt, recline, arm, and seat-depth controls one at a time.
- Stand, roll, swivel, and sit again to confirm that the cover does not interfere with moving parts.
- Inspect the underside after the first short session for loose staples, pulled fabric, or a fastener that has backed out.
If the panel moves, the seat shape has changed noticeably, or a control no longer works normally, stop using the chair until the problem is corrected. OdinLake owners who cannot verify a part or removal sequence can use the customer-support page with the model, order details, and clear photos of the label and affected area.
Frequently asked questions
Can every office chair be reupholstered?
No. A removable padded panel with accessible staples is a practical DIY candidate. Tensioned mesh, molded shells, bonded covers, sewn multi-panel upholstery, electrical features, hidden fasteners, or structural damage usually need an exact replacement part or professional service. Confirm the model’s construction before buying material.
Can you reupholster a mesh office chair?
Do not apply this stapled-fabric method to load-bearing tension mesh. The mesh and the way it is retained by the frame determine support and tension. Use the manufacturer’s replacement panel or service route. If the mesh is only dirty and remains intact, follow the care instructions rather than covering it.
Can you put new fabric over the old office-chair fabric?
Removing the old cover is usually the better method because it exposes damage, preserves the panel’s intended thickness, and reveals the original attachment pattern. Adding a second layer can create bulky corners, hide failed foam, or block trim and mounting holes. Keep the old fabric only when the construction instructions explicitly allow it and the layer is clean, secure, thin, and undamaged.
What fabric is best for reupholstering an office chair?
Choose upholstery sold for seating and matched to the chair’s daily use. Review intended application, physical properties, abrasion, colorfastness, crocking, cleanability, thickness, and pattern direction. Do not select from a rub-count claim alone, and keep the supplier’s technical and care information with the project record.
Can you reupholster an office chair without removing the seat?
Not reliably when the cover attaches beneath a removable panel. Working around the assembled mechanism makes it difficult to inspect the pan, manage tension, reproduce corners, and keep fasteners and controls clear. If the panel is not designed to come off according to the manual, use a fitted removable cover or professional service instead of forcing access.
Is it cheaper to reupholster or replace an office chair?
It depends on the chair’s condition, construction, material cost, tools, labor, and available replacement parts. Recovering a sound removable seat panel can be economical. Professional pattern work, new foam, structural repair, or compliance work can exceed the value of a basic chair. Compare the complete repair cost with an equivalent replacement, not just the price of fabric.
Can office-chair arms be reupholstered?
Only if the arm includes a removable padded insert designed for recovering. Many task-chair arm pads are molded components with controls, pivot points, or mounting access beneath them. Covering those surfaces can restrict movement or hide damage. Replace a damaged pad with the correct part or follow the manufacturer’s service instructions.
Recovering an office chair is successful when the finished panel looks tidy and the chair works exactly as it did before. Keep the project narrow: document the model, replace only the cover on a sound removable panel, preserve the original attachment method, and route anything structural, tensioned, powered, or uncertain to the appropriate service path.